I have a pair of Athleta joggers that I wear all the time. They are comfy, stylish, and fit well around my bigger than average calves lol. Which also means they are easier to take off or pull up around my calves. This is all due to the vertical panel along the inseam made of knit fabric, while the rest of the pants are made on woven non-stretch nylon. The only issue with them is that because they are made of nylon, they can get kinda sweaty and sticky over time. So, I wanted to make a more breathable pair. I saw that Athleta has linen joggers, but none that are just like this with the vertical stretch panel. So, I set out to make my own pair.
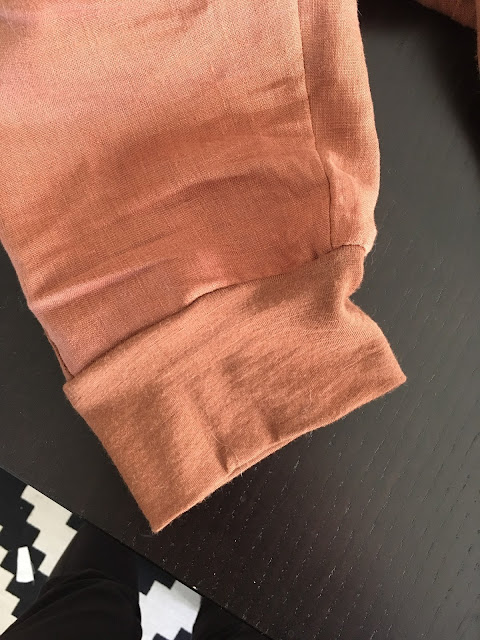
stretchy goodness

After calculating the minimum amount of fabric I would need, I bought 3/4 meter ZQ Merino in Acorn for $25.50, 1 1/4 Vintage Finish Linen in Acorn for $20.00, both from https://weare.thefabricstoreonline.com. Even though they have the same color name, they don't actually completely match, which I wanted, because I don't want the panel to be in a contrast color, as that isn't the look I'm going for. They still work together, but I do wish the shop would stock their linen and merino lines in matching colorways. Just saying. I actually have a ton of the merino left over. Since the inseam panel needs horizontal stretch, and the fabric only has selvedge to selvedge stretch (as it has no spandex content), I had to buy that amount to cover the full length of my inseam. With the leftovers, I could probably eek out a tank top or some accessories. However, next time, I might consider buying a shorter length and piecing the panels together. No one but me is really looking at my inseam anyway.

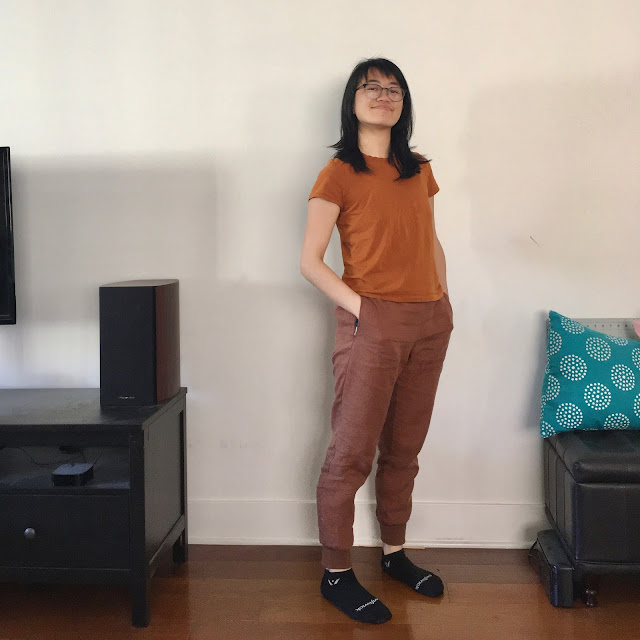
somewhat frumpy bum in linen heh
Also, I still have about 14 inches left over for the linen. I was probably going to add more pockets, but decided on only side pockets (which I used mostly a cotton fabric for), thus the extra amount. Wonder what I can make with the rest (dish cloths? contrast pockets for other pants?).
So, the first mission was to construct some well fitting pants, which I thus far have not accomplished. I tried a few years ago, but it was a struggle, and just didn't think about it again until now. Most will probably agree with me. Since I've been getting into drafting my own patterns (drafted a hoodie recently which was pretty fun), I decided I would draft my own for these. I did try to find a pattern with the exactly features of my Athleta joggers (vertical inseam panel, optional cargo pockets, woven joggers, knit waistband instead of casing), but there weren't any that had all of these features.
Having fun with posing 😎
I followed a tutorial online to create my first pair, using my own measurements and of the Athleta joggers. They were pretty bad. So, I followed another tutorial and incorporated some of the info from the first tutorial to create muslin #2. They ended up better but didn't fit like the Athleta's.
Finally, I decided to do a rub off of the Athleta. Wasn't a true rub off, as I didn't have a surface I could pin in to, so I chalked a lot of lines and measured a lot to draft what I thought it would look like if deconstructed. Turns out, it was a success! However, NOW I realize that even though there is enough crotch depth, the butt did not look good, kinda made me look like I had a pancake butt, when my butt is actually very well toned thankyouverymuch. I didn't mess up on the rub off, it's just that I just realized how weird my butt looks in the Athleta's and now that was shown in muslin #3. Since I had been looking at my butt so much for the past week ( weeks? I think muslin #3 was created the week after I started on this project) and since I was already 3 muslins deep, I wanted to get the fit right. I checked the my pattern alterations book and assessed all my fit issues, along with more blog posts I found. I won't go in the nitty gritty of what I did exactly, because I didn't photograph the drafting process or any nice photos of me in the muslins, but I mostly fixed the fit issues. However, due to the nature of linen fabric, having quite fluid drape, my butt doesn't look that great in these, but they are better than the Athleta pair, trust me!

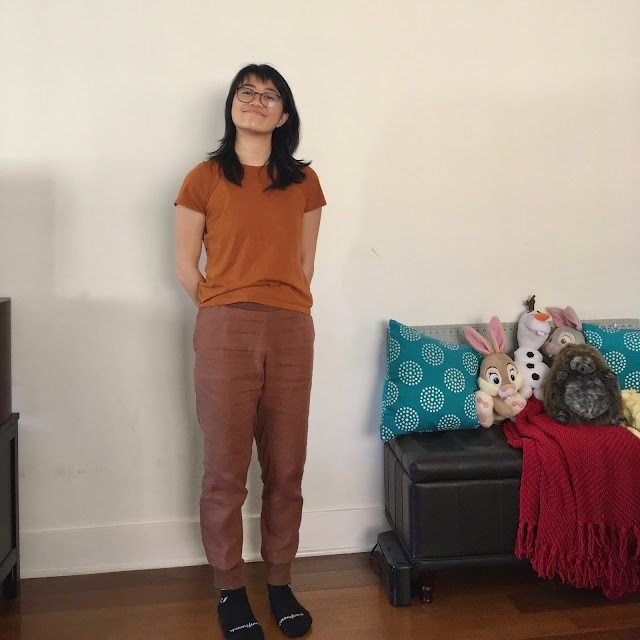
I know I look super cool posing next to cute and cuddly stuffed animals
After all the muslins (which was more like 3.5, since I reused one muslin and drafted new back pieces + all the additional changes I did to existing muslins), I was finally able to add the additional features, like side pockets and the vertical inseam panel. I also really wanted back pockets. I almost never use them, but half the purpose of back pockets are to make your butt look good. But alas, I was running out of steam drafting new pieces. Plus figuring out back patch pocket placement and size is kind of a headache in and of itself. I could do welt pockets instead, but ack, I haven't done those in forever, and I don't want to create a hideous welt pocket that can't be undone. Also didn't add the cargo pockets like the Athleta's. I use those quite often, but I decided these would be an at-home pair, where I won't need to be carrying so much stuff (I rarely use a purse or handbag, so I love "stylish" cargo pants for going in public).
cotton lawn in pocket. ack!
Speaking of pockets, the side pockets are made of cotton lawn from my stash. Lawn may have been a bad idea though. I didn't want bulk in the pockets, but after finishing the pants, I read that lawn is not recommended for pockets, and that the pockets will develop holes before the pants will. Whoops. We'll see how they hold up over time. Next time, I'll probably use quilting cotton, or self fabric (depending on the pocket type, I don't want pocket fabric to be noticeable if my pockets gape open, like when sitting).
I also added interfacing to the waistband, using knit tricot interfacing from Fashion Sewing Supply. In hindsight, this was not a good interfacing to use for this application. When the waistband is stretched, it creates weird wrinkles on the outer fabric. This is probably because the interfacing is being stretched to the point the adhesive dots get separated too much. Next time, I think I'll try a different interfacing, or elastic encased in the waistband.
This was also my first time drafting without seam allowances and adding them in when cutting. I was initially resistant about it, but it actually makes the fitting process and fit transfers to paper much easier. Plus, adding seam allowances on the fabric was not as difficult or annoying as I thought it would be, and you can add different amount of seam allowances each time you make the pattern, which is nice if you are a bit short on fabric, etc. So I highly recommend drafting/fixing sewing patterns without seam allowances!
Despite all the potential issues, I'm loving my pants that I'm wearing right now. They look professional and fit better than the Athleta's. Kinda itching to make more now, with the other features I want.


